
Ellie x Boudreaux boys 5.5 weeks
Ellie x Boudreaux girls 5.5 weeks
Ellie x Boudreaux 8 - 10 weeks
Ellie x Boudreaux: Junior and Sassy
|
This is our method for taping ears. This page describes the steps to prepare the supports. "Ear taping" refers to supporting a cropped ear on a puppy until the cartilage hardens and the ear stands by itself. Done properly, it is NOT a painful procedure. But it can take up to a year or more to get ears to stand, so it can be quite a commitment. Do NOT get your puppy's ears cropped unless you are prepared to find a veterinarian who is an expert at this surgery. It's an art as much as anything, and a bad ear crop can really ruin the looks of a nice dog. Ask show breeders of Danes and/or Dobermans in your area who they go to. You also need to be honest with yourself that you will be willing and able to provide the follow up care! You can take the puppy in to the vet each week to be re-taped, but it is much easier on your puppy if you learn to do it yourself. If you get your puppy before the ear crop, the very FIRST step is to handle the puppy's ears a lot. Not just scratching behind the ears, but gently clean them, massage around the base and up the length of the ear, and gently stretch the ear upward. Give the puppy many small treats and lots of praise while you practice this! You want to teach the puppy that it doesn't hurt to have her ears handled. If approached correctly, ear taping can be a calm, pleasant experience for both the puppy and her owner. You can also use corset stays which can be purchased at historical costume shops such as Townsend's The section below on "measuring the stay" will tell you what size to order if you are using corset stays. Rollers: Get a package of small size self-holding hair rollers. This is NOT a foam roller. This type has a plastic framework covered with Velcro, and is hollow. You can find them anywhere, I ususally get mine at a Dollar store. Tape: I like to use two kinds of tape. For preparing the ear support (the stay and the roller), I like to use a really sticky tape like Covidien Kendall Standard porous tape (substitute for Curity tape by Kendall, discontinued) because it is really sticky. Also, it is cheaper than the Zonas tape by J&J that I prefer for taping the supports to the ears. I like using Zonas on the ears because it isn't quite as sticky, and won't pull out so much hair when you remove it. You use up a lot more tape padding and back-taping than you do wrapping the ears. But many people use one brand of tape for everything. That is fine too - sometimes you have to experiment to find what works for you. You can find these brands of tape at most medical supply stores - I usually order mine from Amazon. You'll want a total of at least one case (12 rolls) of 1 inch tape for an average puppy. 1 1/2 or even 2" is OK, if that's all you can find. Glue: You will need a medical grade liquid glue like Torbot bonding cement or Skin-Tac. Do NOT use Krazy glue or anything like that on your puppy!! Adhesive remover: You will also need a good, gentle adhesive remover to make it comfortable for your puppy when it is time to remove the supports. I really like Uni-Solve. You can find both the glue and the Uni-solve at medical supply stores or Amazon. In a pinch, olive oil can be used to remove the glue and ear supports, but be aware it's a little harder to get the puppy's skin and hair really clean so the tape sticks the next day when you put the ears back up. ONLY USE GLUE AND ADHESIVE REMOVERS THAT ARE SAFE FOR SKIN. In addition, you will need bandage scissors, a file or Dremel, something to protect the top of your work surface from the glue, and lots of yummy little treats for your puppy! |
|
 |
Step 1 - Wait until your puppy is tired!! Like any grooming task, it is MUCH easier on everyone if you wait until your puppy has had some play time and a meal and is ready to sleep for a while. Wrestling with a puppy who is in full-fledged PLAY MODE is frustrating for everyone!! I typically tape my dog's ears in the evening before bedtime, but you can do it anytime the puppy is ready for a nap. The first few times you put up your puppy's ears you will need a helper. Your helper should GENTLY restrain the puppy in a way that you can still get to the puppy's ears and see the puppy's head (so you can see if the ears are positioned properly). I personally find that after the first time or two, I don't need a holder except maybe to hold the pup's head straight while I make the "bridge". But all puppies are different, if your puppy is calmer with someone holding him or if it is just a lot easier for you, then by all means have someone hold the puppy for you. |
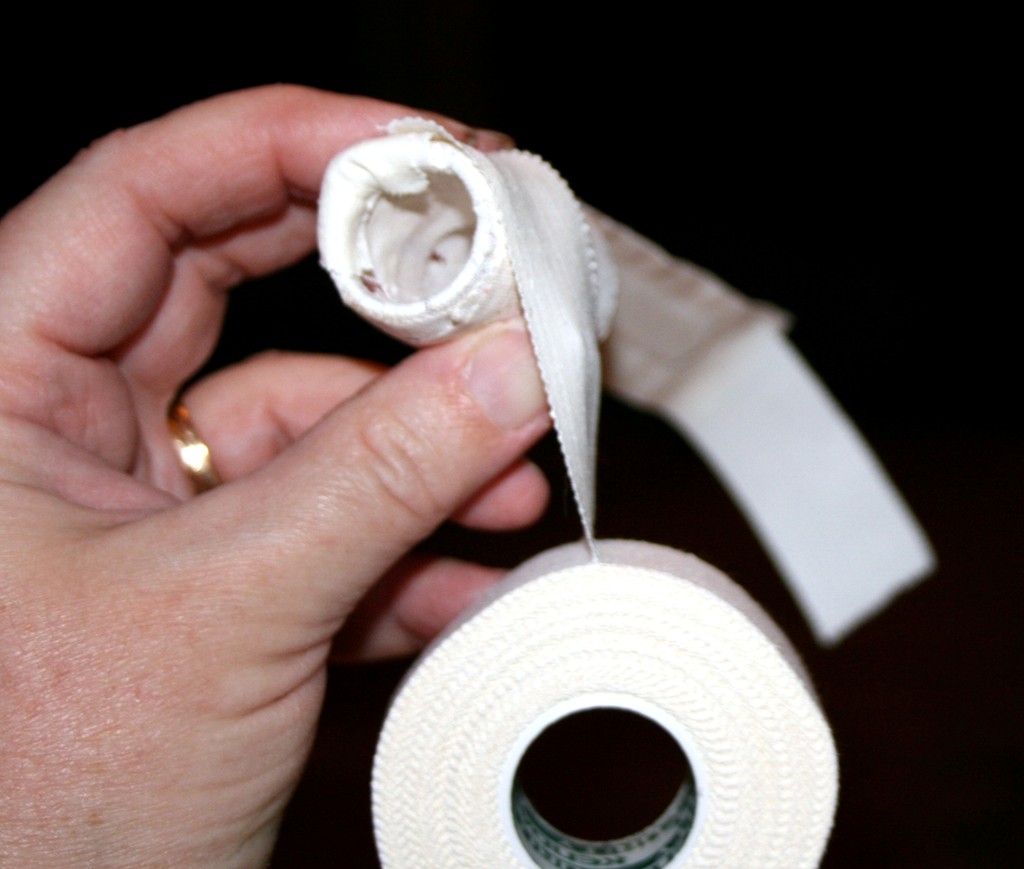
| Measuring the Stay To measure your puppy's ear, gently stretch the ear up and measure from the knob you see in the photo up past the tip of the ear. Ideally you want the stay to extend about a quarter inch past the tip of the ear. If you want to use the corset stays, measure your puppy's ears and order the nearest size that is NO SHORTER than the ear. Then, since Dane puppies grow so fast, order one or two more pairs each 1/2" longer than the others so you'll have longer stays ready for your puppy to grow into. The stays can be re-used, often for several weeks. However, ALWAYS measure the stay against the pup's ears before you get started!! One day the stays you've been using will be too short - better to find that out before you have prepared the whole ear support! |
 |
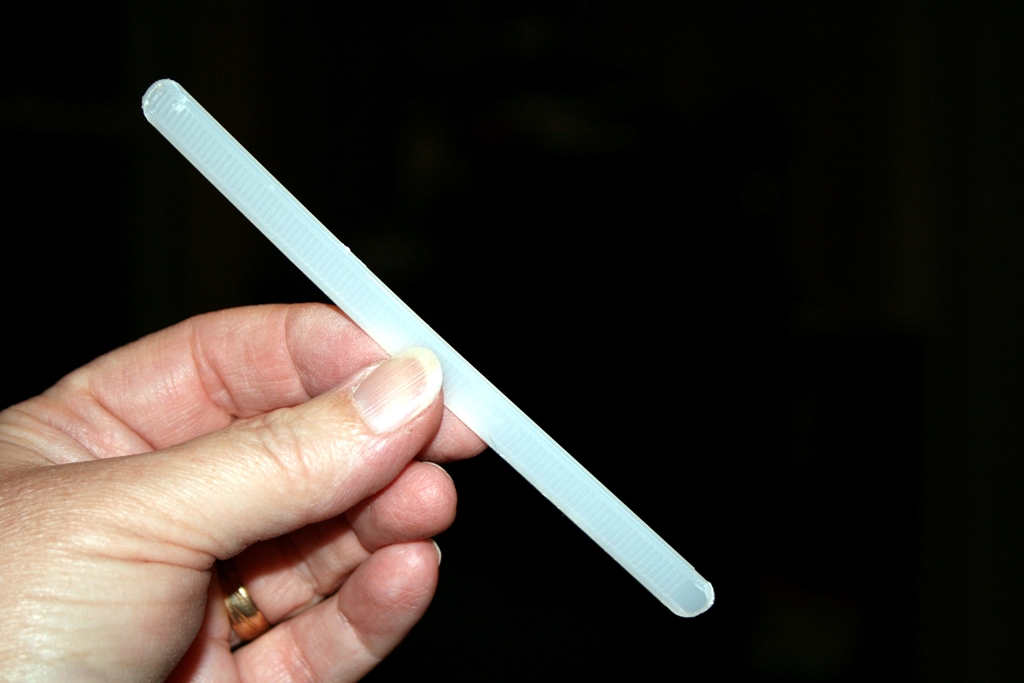 |
The Stay Cut the stay to the correct length - save the rest of the cable tie to use for future stays. Smooth the cut edges with a file or Dremel. Repeat for the second ear. |
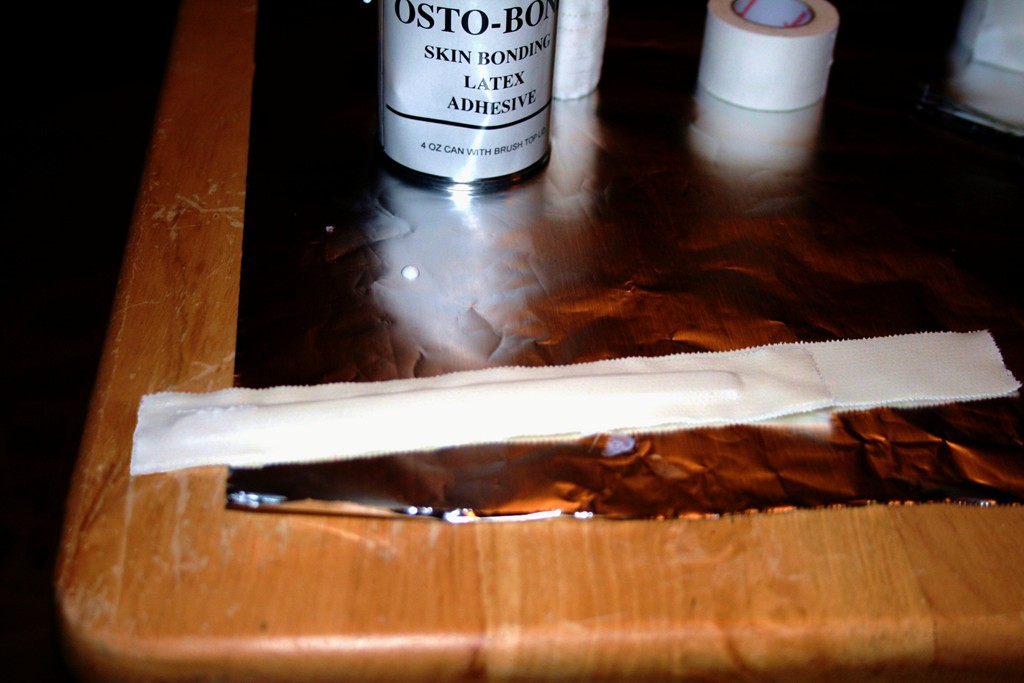
| Step 2 - the Stay Sandwich To prepare the stay, tear a piece of your stickiest tape about 1.5" - 2" longer than the stay. Lay that piece STICKY SIDE UP on your table. Lay the stay on top, near one end and centered width-wise. Tear a second piece just a little longer than the stay - this second piece can be as long as the first piece but doesn't have to be - and lay that also STICKY SIDE UP on top of the stay. Use your fingers to seal the tape around the stay. |
 |
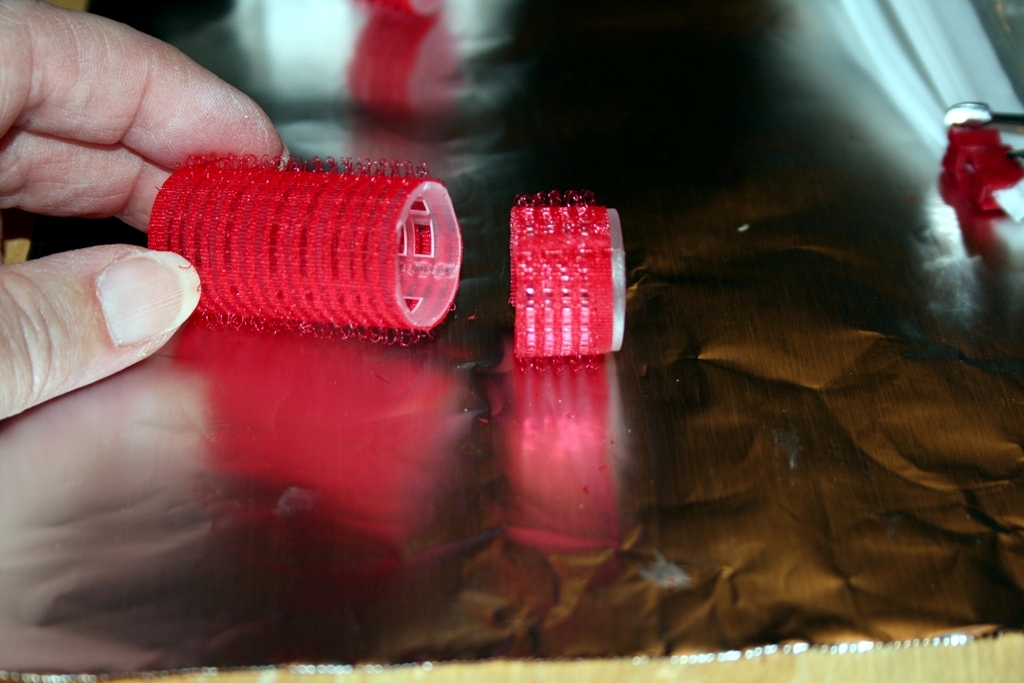 |
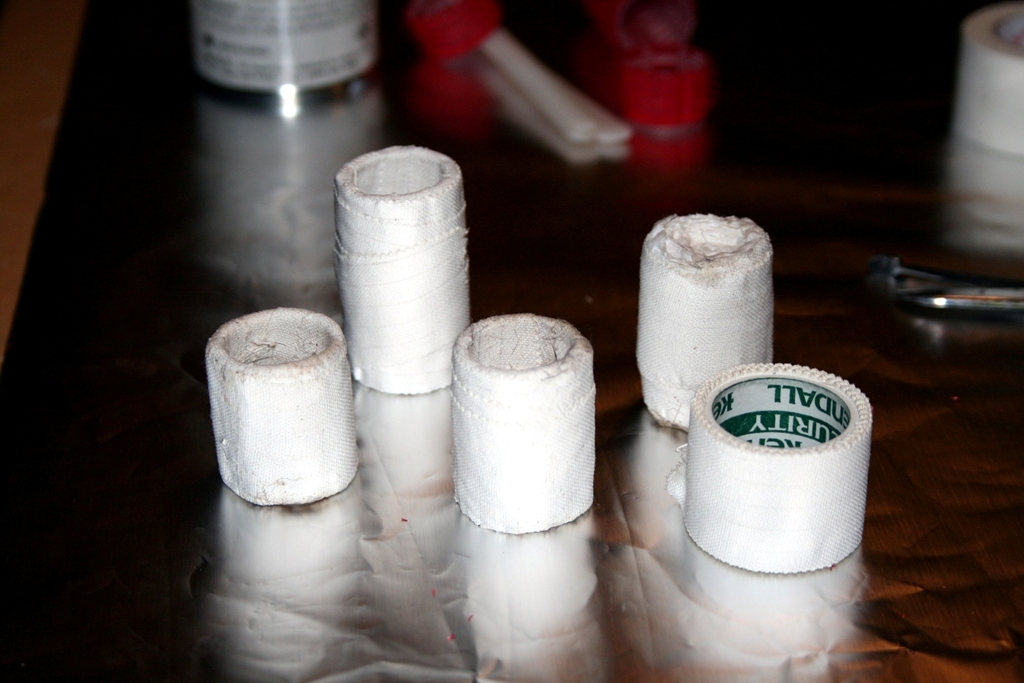
Step 3 - preparing the base (roller) Most of the time, you will cut one roller in half and that will be perfect for your base. By the time it occured to me to document how I put up ears, Dakota was almost 6 months old and needed a slightly taller base to support her ears. Many puppies NEVER need a taller base, it just depends on the dog and how their ears are growing. So in this photo, obviously I haven't cut the roller in half. But that's what you will do! Then remove the velcro - it actually will be easier for you if you remove the velcro BEFORE you cut the roller - and file the cut edges smooth. Pad the roller by covering it with Curity tape, being especially careful to pad the edges. Lastly, back tape the roller sticky side out. |
| Examples of finished rollers You can make the roller any size you need. To start with, always use a half roller without the velcro. Later on, if you need to make the base taller you can do that, or if you need to make it wider just leave the velcro on. NOTE: However, I have learned that if the base is too large, the ears won't stay up as long! If you experiment with a larger base and find that your ear supports come loose in a few days, that is the problem. Go back to a smaller base. You will notice that the roller in the back on the right (behind the tape) looks different. That one was made by folding and then tightly rolling up a piece of paper towel. That is a good method of making a base too - the advantage is that a paper towel base is softer but the disadvantage is that it is slightly heavier. I use paper towel bases if the pup starts to get an abrasion on the ear from the edge of a roller. But if you pad the roller really well, that shouldn't happen. |
 |
 |
Step 4 - Preparing the support Place a back-taped roller against the BASE of the NON-STICKY side of one of the stay sandwiches. The base is the end closer to the edge of the tape. The long tail of tape will go over the tip of the puppy's ear. Wrap a piece of tape around the roller and the stay to hold them together, and then back-tape the roller again. Tuck the little tail of tape at the base of the stay sandwich inside the roller, and if necessary stick some tape on it to hold it in place. |
| Step 5 - Apply the Glue Once you have prepared the supports for both ears, apply a thin layer of skin glue to the sticky side of the stay and about half the roller. You should not need to put glue on the free end of tape that will go over the top of the ear. |
 |
|
|
Still Snoozing You can see how worried Dakota is as I prepare to put up her ears! |
|
Ready to start The last step is to cut or tear 4 pieces of Zonas tape about 10" - 12" long, and if you will need to make a bridge cut or tear 2 more pieces each about 14" long. Arrange the tape and your finished ear supports where you can reach them easily. Have your scissors and extra tape handy in case you need it for an adjustment. Now you are ready to put the ears up - these instructions are continued on the Ear Taping - Procedure page. |
 |
